Screenshots 101
8 04 2008This weekend, after witnessing a friend take a physical picture of something on his screen, I am writing the ultimate screenshot guide for OS X. Even if you already know how to take a screen shot you will probably learn something new!

An example of a screenshot.
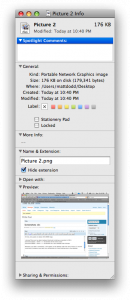
A screenshot is a digital picture of the contents of your screen. You can use screenshots in a seemingly endless number of situations from proof, to create a receipt or document something funny found on the internet or your computer. In Mac OS X, all screenshots are taken in the PNG (Portable Network Graphic) format by default, which is a high quality picture format, and usually are about 150~200KB large- but depend on the size of the image.

Information about a Screenshot.
If you want to change the format which OS X saves the screenshots, you can change it by copying and pasting the following terminal command:
defaults write com.apple.screencapture type image_format
killall SystemUIServer
Change image_format with your choice of:
jpg
tiff
pdf
png
bmp
pict

An example of two screenshots.
Whenever you take a screenshot, it will appear on the desktop under the name “Picture 1” and will numerically increase (Picture 2, 3) as you take more screenshots (or have existing ones on the desktop).
There are four basic keyboard shortcuts to taking a screenshot in OS X:
Command (Apple) + Shift + 3 = Screenshot of your entire screen
Command (Apple) + Shift + 4 = Screenshot of a user selected area
Command (Apple) + Control + Shift + 3 = Screenshot of your entire screen, copied to clipboard
Command (Apple) + Control + Shift + 4 = Screenshot of a user selected area, copied to clipboard
While the screenshot of your entire screen (Command + Shift + 3) is useful, there are far more options for manipulating your screenshot using Command + Shift + 4; so the rest of the article will focus on the latter.

The cross found by Command + Shift + 4
When you press Command + Shift + 4, your cursor will disappear for something that looks like a cross. You can drag it around the subject you want by clicking and dragging so that when you let go of your mouse button, it will take a screenshot of the selected area.
When selecting an area with Command + Shift + 4:
You can press the space bar and the cross will disappear for a camera that will automatically select the contents of a window.
You can hold down Option key to scale the selection area.
You can hold down Shift to only expand the selection box horizontally or vertically.
You can press space after making a selection to move around the selection box.
If you haven’t taken a screenshot before, I hope you can now refrain from taking a physical picture of your screen. Enjoy the new tricks, impress your friends and teach them how to take better screenshots!


 RSS 2.0