A Brief Look into MobileMe: How to Configure and Setup Syncing between your Mac, PC and Mobile Device (iPhone/iPod Touch)

16 07 2008

With MobileMe almost live for one week (barring downtime), it is time to take a quick look on how to setup your Mac, PC and iPhone/iPod Touch to all be in sync.

For those of you who subscribed to .Mac, or recently purchased a MobileMe account, you may be already taking advantage of the new powerful “Push” syncing across your many devices. Incase your aren’t, or you don’t already have MobileMe, this is a brief tutorial to setup your different devices to sync with each other.

Mac:

Make sure you are running 10.5.4, go into System Preferences and under “Internet and Sharing”, the first thing you should see is MobileMe. If it still says .Mac, don’t worry- as long as you are connected to the Internet, click on the .Mac preference pane- you should get a message that looks like this:
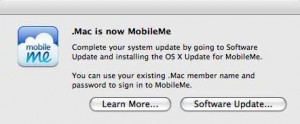
It should bring you to Software Update, and were you can download the “Mac OS X Update For MobileMe”. Once you have the MobileMe preference pane, you can begin Syncing your Mac to the MobileMe servers. Simply enter your login information, and in a few moments your data will be pulled into System Preferences. Tab over to the “Sync” pane and check the items you would like to sync up to MobileMe. Also, pay close attention to the “Synchronize with MobileMe:” setting.
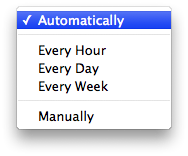
Apple has falsely advertised MobileMe as being a complete push solution for the Mac. This is not entirely true- while MobileMe does push to the Web and iPhone/iPod Touch devices, new information isn’t pushed to the Mac or PC. Rather, it is automatically pulled every 15 minutes if you have the “Synchronize with MobileMe:” set to Automatic. Once you have successfully synced with MobileMe from your Mac, you are ready to move onto other devices.

Hit the jump to see how to sync with the PC and iPhone/iPod Touch. Read more…


How to switch your data from an existing iPhone to iPhone 3G

7 07 2008

Guest poster Dave Merten from Macsimum News gives us a tutorial of migrating from the current iPhone to the new iPhone 3G. You can read his original post here on Macsiumum News!

Getting ready to replace your iPhone this Friday with a new 3G model? Well, this article explains how to replace an original iPhone with an iPhone 3G using the same carrier. If you follow these steps to backup your original iPhone first, and then restore the backup to your iPhone 3G, your saved SMS messages, email accounts, photos, notes, and other personal settings will be present on your iPhone 3G.

To replace an original iPhone with an iPhone 3G, follow these steps:

1. Purchase iPhone 3G from an Apple Store or from a carrier. In the US, iPhone 3G includes a SIM and your original iPhone’s SIM is not needed. Your original iPhone account information will be transferred to iPhone 3G’s included SIM when you purchase iPhone 3G. To dispose of your original iPhone SIM, contact your carrier. In other countries where the original iPhone was sold, you can use your original iPhone’s SIM with iPhone 3G. Contact your carrier for additional information.

2. Make sure you have the latest version of iTunes and iPhone OS. Click to download the latest version of iTunes. Note that when you start using iPhone 3G, you will need iTunes 7.7 or later.

3. Connect your original iPhone to iTunes and sync it. Verify that your original iPhone is backed up. For more information on how to do this, see iPhone: About backups.

4. Connect iPhone 3G to iTunes (on the same computer you used to back up your original iPhone), and then iTunes will ask you if you want to restore from a backup or set up iPhone 3G as a new phone. When prompted, select the backup of your original iPhone.

5. After iTunes finishes restoring the backup you selected to iPhone 3G, iPhone 3G will restart. When iPhone 3G appears again in the iTunes window, select it. Then click the tabs (Music, Photos, and so on) and verify or change the items you want to sync. Then click Apply to sync iPhone 3G with iTunes.

6. Verify that your saved SMS messages, email accounts and passwords, photos, notes, and other personal settings are present on your iPhone 3G.

If saved SMS messages, email accounts and passwords, photos, notes, or other personal settings are not present on your new iPhone 3G, the restore from backup may not have been successful. In that case, verify your original iPhone is properly backed up (see step 3), then use iTunes to restore iPhone OS on iPhone 3G and continue following these instructions at step 4.
To erase your original iPhone so someone else can use it, tap Settings > General > Reset > Erase all contents and settings on your original iPhone.


Screenshots 101

8 04 2008

This weekend, after witnessing a friend take a physical picture of something on his screen, I am writing the ultimate screenshot guide for OS X. Even if you already know how to take a screen shot you will probably learn something new!

Screenshot Example
An example of a screenshot.

A screenshot is a digital picture of the contents of your screen. You can use screenshots in a seemingly endless number of situations from proof, to create a receipt or document something funny found on the internet or your computer. In Mac OS X, all screenshots are taken in the PNG (Portable Network Graphic) format by default, which is a high quality picture format, and usually are about 150~200KB large- but depend on the size of the image.

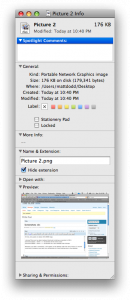
Screenshot Information
Information about a Screenshot.

If you want to change the format which OS X saves the screenshots, you can change it by copying and pasting the following terminal command:

defaults write com.apple.screencapture type image_format
killall SystemUIServer

Change image_format with your choice of:
jpg
tiff
pdf
png
bmp
pict

Screenshot Order
An example of two screenshots.

Whenever you take a screenshot, it will appear on the desktop under the name “Picture 1” and will numerically increase (Picture 2, 3) as you take more screenshots (or have existing ones on the desktop).

There are four basic keyboard shortcuts to taking a screenshot in OS X:
Command (Apple) + Shift + 3 = Screenshot of your entire screen
Command (Apple) + Shift + 4 = Screenshot of a user selected area
Command (Apple) + Control + Shift + 3 = Screenshot of your entire screen, copied to clipboard
Command (Apple) + Control + Shift + 4 = Screenshot of a user selected area, copied to clipboard

While the screenshot of your entire screen (Command + Shift + 3) is useful, there are far more options for manipulating your screenshot using Command + Shift + 4; so the rest of the article will focus on the latter.

The Cross
The cross found by Command + Shift + 4

When you press Command + Shift + 4, your cursor will disappear for something that looks like a cross. You can drag it around the subject you want by clicking and dragging so that when you let go of your mouse button, it will take a screenshot of the selected area.

When selecting an area with Command + Shift + 4:
You can press the space bar and the cross will disappear for a camera that will automatically select the contents of a window.
You can hold down Option key to scale the selection area.
You can hold down Shift to only expand the selection box horizontally or vertically.
You can press space after making a selection to move around the selection box.

If you haven’t taken a screenshot before, I hope you can now refrain from taking a physical picture of your screen. Enjoy the new tricks, impress your friends and teach them how to take better screenshots!


Teach your Apple Remote New Tricks!

2 04 2008

Yesterday, my article discussed the Apple Remote being removed from the box inside new Macs. Today, I’ll show you three ways you can better use it, if your were lucky enough to get one for free, or recently paid for one.

Apple Remote Tricks
Teach your Apple Remote new tricks!

If you have purchased a laptop since 2005, there is a very good chance it has a ‘SMS’ or Sudden Motion Sensor. This is basically an accelerometer which detects any sudden movement and will stop spinning the hard drive if enough movement is detected to protect it from being damaged in the fall, thus saving your data. Since the introduction of the Sudden Motion Sensor, developers have found clever ways to implement the accelerometer in their applications. Among the most useful is iAlertU.

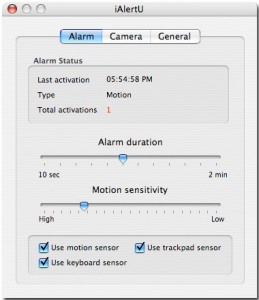
iAlertU

iAlertU is an alarm system for your Mac. When motion is detected, the alarm is triggered, and it will even capture images from your iSight of the perpetrator. You can use your Apple Remote to enable or disable the alarm, and it will chirp like a car! iAlertU is free, and available for download from SourceForge.

If you of are the more curious type, you might have already discovered that within a lot of Apple applications, you can use the remote. If you haven’t, for example, in QuickTime player, you can use the pause, forward, backward and volume up/down buttons to control a movie playing. In Keynote, you can advance a slide with the remote. In iPhoto, you can advance a photo with the next button on the remote. Maybe you get the idea.

A couple less intuitive secrets about the remote:

You can put any Mac with an IR receiver, docked iPod (with IR receiver) or AppleTV to sleep by pressing and holding the Play/Pause button. Pressing any button on the remote will then wake up the device.

Holding down the Menu button on the remote during startup of an Intel Mac will bring you to the Startup Manager (also accessible by holding the Option key). Also in this menu, you can eject a CD or DVD by pressing the volume up (+) button on the remote.

RemoteBuddy

Finally, if you are looking to do even more, there are a number of third party applications that will let you just about anything imaginable with your favorite remote. It comes down to a personal choice, but my favorite is RemoteBuddy. RemoteBuddy will allow you to use not only your Apple Remote, but many other IR based remotes- even a Wiimote! Touting support for over 100 applications, RemoteBuddy lets you easily configure your remote to do exactly what you want. Recently, RemoteBuddy added an ‘AJAX Remote’, which allows you to use your iPhone or iPod Touch to control your computer and interact with it similar to the Apple Remote, through Safari.

While RemoteBuddy is probebly the most robust and feature filled, you can also check out SofaControl, Mira and iRed Lite.

Hopefully now, you will give your remote a second look, and hopefully put it to use better- be happy if you got it for free!

Disable IR Receiver Preference Pane

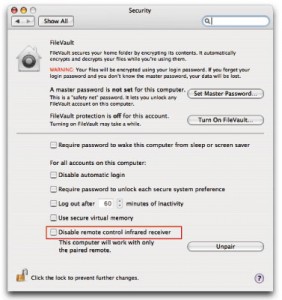
Also, as a side note, I highly recommend anyone with a Mac with an IR Receiver goes into the Security Preference pane and disable the receiver, so only paired remotes will work with your computer. This prevents anyone else with a Apple Remote bringing you into Front Row, or whatever you have your remote doing.


You’ve got questions… we’ve got answers.

5 03 2008

A reader asked (a little too long ago) a couple questions about Time Machine. Here are some answers.

When Time Machine keeps writing backups of everything you do and all you are doing is writing huge failed movie files how do find the files on your Time Machine disk to clean house?

The answer for this is quite simple. At first you might think that deleting a file from Time Machine is redundant, but when you have multiple copies of files that are very large- your disk space is precious! When you enter Time Machine, simply highlight the file (or folder) you want to delete from backups and click on the Gear menu item. An option “Delete file from all backups” will be present, and this is what you want! To prevent it happening in future backups, you may want to go into the Time Machine System Preferences pane and click on the Options. From there, you can specify what you don’t want Time Machine to backup. Be it your Final Cut project file, or Movies folder.

Is there a way of telling TimeMachine to only go to work at night?

Apple does not provide a solution to this issue, but you can use TimeMachineScheduler, which will allow you to specify a 1-12 hour period for backups and a slew of other options for customizing Time Machine backups. This should do the trick.

If you or someone you know have any questions for theiLife, feel free to Contact Us!


Video Tutorial #1 – Move Mail Accounts and Preferences

4 01 2008

[qt:/media/vodcast/vidcast_tip_1_ipod.mp4 /media/vodcast/vidcast_tip_1_poster.mov 320 255]

iPod-Ready (14 MB)

High Quality (597 MB)

At some point, we have all wanted to move our email accounts and mails over to another computer. Unfortunately, Mail doesn’t make it very easy to do but, it is possible. You can watch the screencast here or continue reading after the jump.
Read more…


Tutorials!

12 12 2007

Here at TheiLife, we are beginning to plan some tutorials (ie, Screencasts) for release in the future. Before we make a move on some subjects that we think our readers might like- it would be awesome to actually hear from you! You can email us, or leave a comment below.

For reference, some subjects we are currently considering are:

-iPhone Unlocking
-Terminal and Mac OS
-Pro Apps (ie moving from iMovie to Final Cut)

Help us help you! Thanks!!


10 Things To Do with Your new iPod

28 10 2007

So, you’ve just purchased one of Apple’s new iPods. Congratulations!


Heres what to do next (in order of importance): 


 Scratched iPod Classic


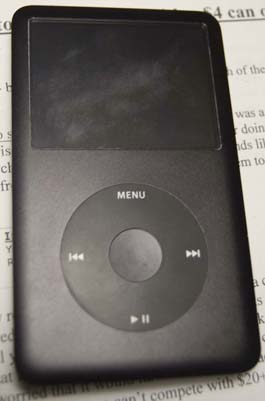
1) Get a case! Now that Apple doesn’t ship those nice little cases with their latest iPods, it is crutial that you get your shiny new iPod in a case ASAP! Don’t think so?! Look at my friends brand new iPod Classic, which is now 2 weeks old, above, as he didn’t feel the need to purchase a case. Those very fine scratches on the screen were caused by a Sharpie, and the back (which isn’t pictured) is marred by scratches and a large ding just from being in his pocket.


ID3? ID What?


2) Tag your library! Ranking very high amongst my pet peeves, a poorly tagged library is not conducive to a true Apple experience. The interface becomes just as useful as any other competitors  similar “MP3 player”. Having things correctly tagged not only makes it easy to find ‘that song you want to hear’ but also saves space, assuming you get rid of all your duplicates (View>Show Duplicates)! You don’t have to go insane, but a little work in iTunes goes a long way.


Drag Albim Artwork Here


 3) Get Album Artwork! The new iPod interface is based around album artwork… keep it pretty!  Adding Album Artwork is as simple as iTunes>Advanced>Get Album Artwork (if your iTunes Music Library is properally tagged) or through a number of Shareware apps such as Album Art Thingy for OS X or iTunes Art Importer for Windows. Don’t let your iPod put that little music note instead of Album Art!


AppleCare


4) Get AppleCare! AppleCare is an invaluable resource to an iPod owner. For when it makes that clicky sound after dropping it randomly or when your headphones stop working after the dog chews it you can find yourself saving money fast. Overnight shipping and English native Customer Support is always great, too!


Ouch!


5) Loose the buds! As cool and convenient as the included iPod earbuds are, they destroy your hearing… which is always bad – what you say? If you refuse to get rid of them, or are an audiophile and need those E2c’s then see the next rule.


5G iPod Volume Limit Screen


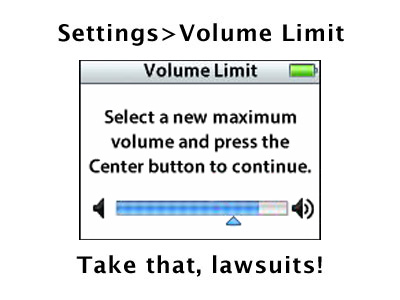
6) Use the Volume Limit! Don’t get me wrong, I love my music loud too. But I have since learned when it crosses the line, particularly for your ears. If you are too poor to afford a new set of headphones or cant live without those E2c’s, then use the Volume Limiter. Your ears will thank you.


iTunes Content


7) Content! Now if I had a dollar for every unused gigabyte on every iPod in the world… Load up that new iPod with your favorite movie, TV Show(s), photos or podcasts! Say what? Yeah, the iPod Nano can do video, too! Convert videos with QuickTime or VLC -both are Mac/Windows compatible and fairly straightforward. 


Stop Charing Incorrectly!


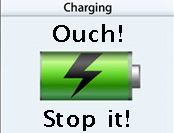
 8)Charge it correctly! Another commonly overlooked mistake with any portable electronic device- don’t charge it overnight! You will kill that battery in a year (or less)! Always cycle your battery (fully charge it, and then fully kill it [repeat]) and never, ever, leave it charging overnight. Charge it during the day, and take it off the charger when it’s done. Your effort will pay off.


Battery!


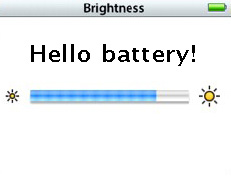
9)Save your battery! Turn down the brightness (Settings>Brightness). Also turn the backlight timer to 2 Seconds (Settings>Backlight Timer)! You will find that your battery lasts longer! Wow!


Accessories


10) Accessorize!! Be you! Get a case that stands out. Get the TV Cable so you can watch that movie absolutely free (always download legally :D). Enjoy your new iPod.